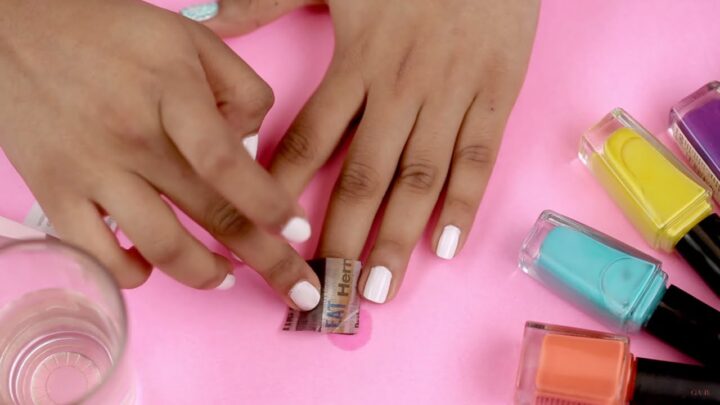
DIY Nail Art: Easy Designs to Try and Make Your Own Nail Salon
Who says you need to go to a nail salon to have beautiful, eye-catching nails? DIY nail art has become a popular and affordable way to express your creativity and enhance your personal style. With just a few tools and some creativity, you can create stunning designs right in the comfort of your own home.
In recent years, nail art has become a fashionable trend, and adorning nails using services such as gel and acrylic nails is no longer unusual. It’s a fun and creative way to express yourself and add some personality to your appearance. However, professional nail art can be expensive, and not everyone can afford to get their nails done at a salon. That’s where DIY nail art comes in! With Maby.us, where there are diverse and trendy nail designs posted by famous nail artists, you can consult and create beautiful designs at home. In this article, we will go over some easy DIY nail designs that you can try on your own.
Tips on how to make your own house into your “Nail salon near me”.
Tools you’ll need
Before we get started, let’s go over the tools you’ll need for DIY nail art:
– Base and top coat: A base coat will help your nail polish adhere better and last longer. A top coat will protect your nail art and add shine.
– Nail polish: You’ll need at least two colors for most of the designs we’ll be going over. Make sure the polish is of good quality and has a smooth finish.
– Dotting tool: This tool is essential for creating dots and small designs. You can also use a toothpick or bobby pin if you don’t have a dotting tool.
– Striping tape: This thin tape is perfect for creating straight lines and designs.
– Nail stickers: If you don’t feel confident in your nail art skills, nail stickers can be a great alternative. They come in a variety of designs and are easy to apply.
– Nail polish remover: This is essential for cleaning up any mistakes you make.
Now that you have your tools, let’s get started on some easy DIY nail art designs!
Design 1: Polka dots
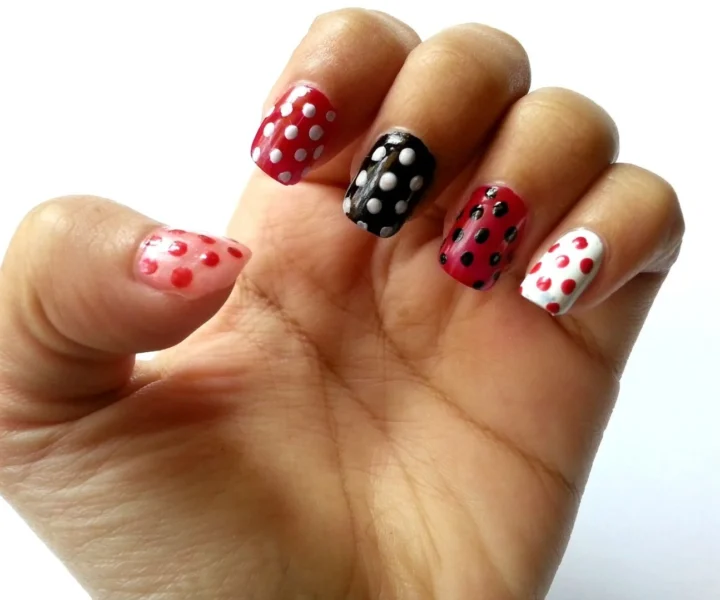
Polka dots are a classic and easy design that anyone can do. Here’s how:
– Apply a base coat to your nails.
– Choose two colors of nail polish. We recommend a light color for the base and a darker color for the dots.
– Once the base coat is dry, dip the dotting tool into the darker color and create dots on your nails. You can create as many or as few dots as you like.
– Let the dots dry completely and then apply a top coat.
Design 2: Stripes
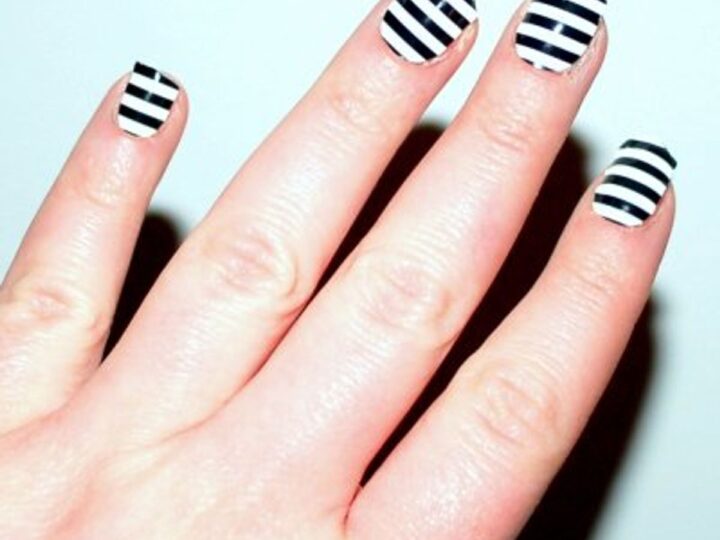
Stripes are another classic design that is easy to do with striping tape. Here’s how:
– Apply a base coat to your nails.
– Once the base coat is dry, apply striping tape to your nails in the pattern you desire.
– Apply a second color of nail polish over the tape.
– Once the second color is dry, carefully remove the tape to reveal the stripes.
– Apply a top coat to protect the design.
Design 3: Ombre
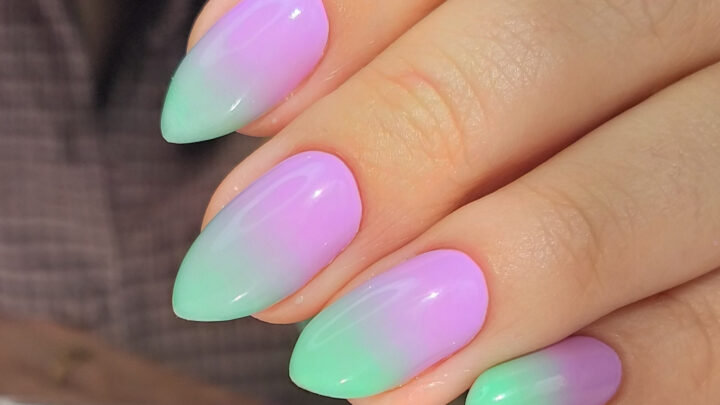
Ombre is a gradient effect that looks great on nails. Here’s how to achieve this effect:
– Apply a base coat to your nails.
– Choose two colors of nail polish that blend well together. We recommend a lighter color and a darker color.
– Apply the lighter color to the bottom half of your nail.
– Apply the darker color to the top half of your nail.
– Use a makeup sponge to blend the two colors together in the middle.
– Let the polish dry completely and apply a top coat.
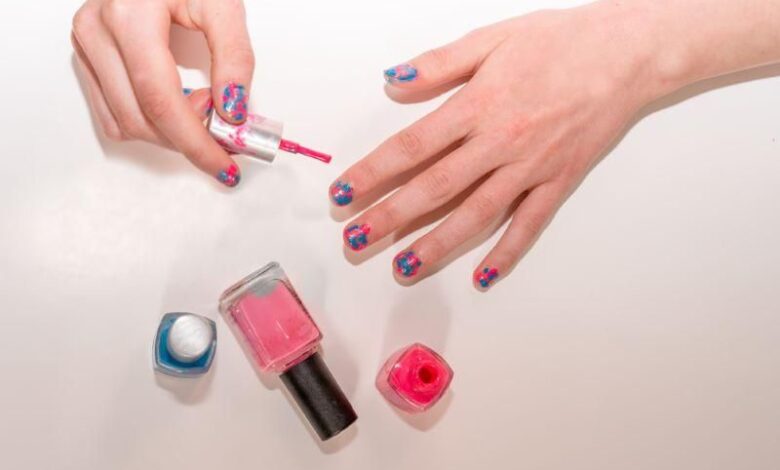
Design 4: Floral

Floral designs are perfect for spring and summer. Here’s how to create a simple floral design:
– Apply a base coat to your nails.
– Choose two colors of nail polish. We recommend a light color for the base and a darker color for the flowers.
– Once the base coat is dry, use the dotting tool to create small dots in a circle to make the center of the flower.
– Then, use the dotting tool to create petal shapes around the center dot. You can make as many or as few petals as you like.
– Use a toothpick or small brush to add small details to the flowers, such as dots or lines.
– Let the polish dry completely and apply a top coat to protect the design.
Design 5: French manicure with a twist
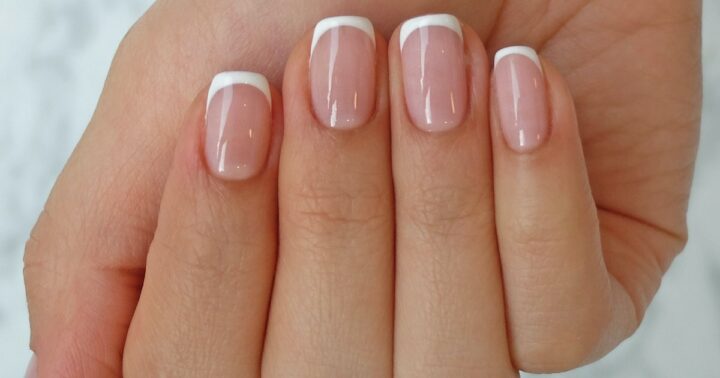
The French manicure is a classic design that never goes out of style. Here’s how to give it a twist:
– Apply a base coat to your nails.
– Choose two colors of nail polish. We recommend a neutral or light pink for the base and a darker color for the tips.
– Once the base coat is dry, use striping tape to create a straight line across your nails, leaving the tips exposed.
– Apply the darker color to the tips of your nails.
– Once the second color is dry, carefully remove the tape to reveal the straight line.
– Apply a top coat to protect the design.
How to remove gel nails at home
Gel and acrylic nails are a popular way to enhance your nails and make them look polished and stylish. However, when it comes time to remove them, it can be a bit tricky. Going to a salon to have them removed can be expensive, but the good news is that you can remove them yourself at home with a few simple steps. In this article, we’ll go over how to remove gel and acrylic nails at home.
For gel nails, you’ll need acetone, cotton balls, aluminum foil, a buffer, and a cuticle pusher. Here are the steps to follow:
- Buff the shiny top layer of your gel nails with a nail buffer to break the seal.
- Soak a cotton ball in acetone and place it on the nail.
- Wrap the cotton ball and nail with aluminum foil to keep it in place.
- Repeat steps 2-3 on all of your nails.
- Wait for 10-15 minutes.
- Use a cuticle pusher to gently scrape off the gel polish.
Conclusion
DIY nail art is a fun way to spruce up your nails and show off your style. With just a few simple steps, you can create unique designs that are sure to turn heads. From easy polka dots to intricate flowers, there’s something for everyone in the world of DIY nail art. Have fun experimenting with different colors, shapes and textures – who knows what kind of masterpiece you could come up with?