An All-In-One Guide to Making Your Dirt Bike Ride Look Stunning
What dirt bike rider doesn’t take pride in their ride? The best way to show it off is to install a full graphics kit, but first-time motorcycle owners often have trouble figuring out how to get started. This article will offer an all-in-one guide to how to choose and apply graphics that will make a bike look stunning.
Where to Buy Graphics Kits
The most important factor to consider when choosing dirt bike graphics is quality. Even the coolest custom designs won’t do riders any good if they can’t hold up to basic wear and tear. Instead of relying on random graphics purchased in a local store, check out sengegraphics.com and place an order from a high-end supplier online.
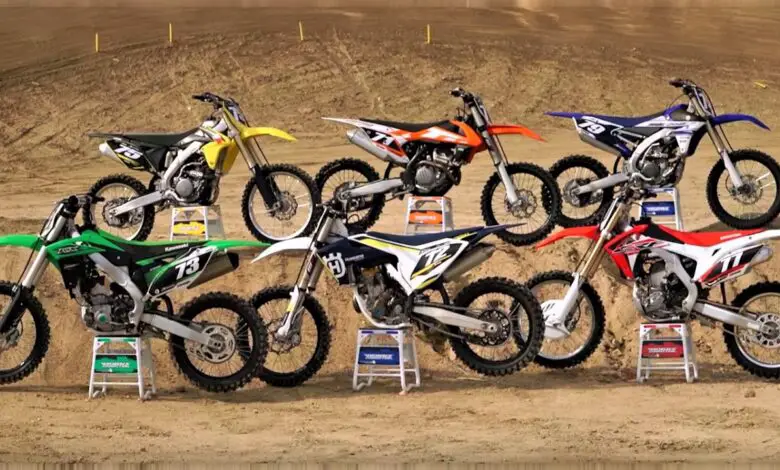
Understanding the Types of Kits Available
Newcomers to the motocross scene often fail to realize how many options they have when it comes to customizing their bikes. There aren’t just many graphics manufacturers and vendors out there. Each of them also offers different types of kits.
1. Full Kits
Full graphics kits are the most popular option. They come with all of the decals required to cover radiator shrouds, front and rear fenders, air boxes, fork guards and tubes, swingarms, and sometimes even seat covers. Some full kits also come with universal backgrounds.
2. Radiator Shroud Kits
Radiator shroud kits only include one or two sets of graphics. The kit will always include radiator shroud decals and may also come with air box graphics.
3. Trim Kits
Trim kits don’t cover the radiator shroud. They come with front and rear fender graphics, plus decals to cover the swingarm, fork tube, and sometimes the air box, as well.
Dirt Bike Graphics Kit Installation Instructions
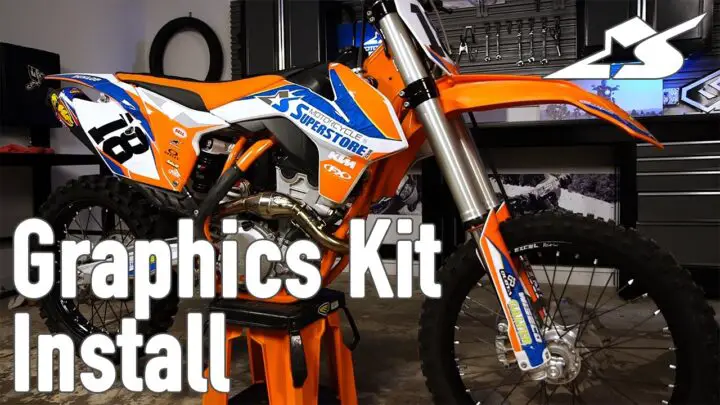
Making sure that dirt bike graphics look their best isn’t just about choosing a reputable vendor that sells high-quality products. Even the best decals won’t look good if they aren’t installed correctly, so riders who are new to dirt bike customization should take some time to familiarize themselves with the basics of the installation process.
Step One: Check Every Part of the Kit
When that new graphics kit arrives in the mail, most riders’ first impulse is to rush out and start sticking on decals immediately. However, mistakes happen even when bike owners purchase graphics through reputable vendors, so it’s important to check the kits first. The best way to do that is by lining up each piece with where it will go on the dirt bike to ensure not just that the company sent the right decals but also that they will fit properly.
Taking the time to check each piece allows riders to send back graphics kits if anything is missing, damaged, or sized incorrectly. Once bike owners start applying the decals, there’s nothing more to be done about it if something is wrong, so take the time to go over everything carefully.
Step Two: Fit the Graphics
Bike owners should also take the time to fit the graphics before installing the new kit. All that takes is laying out the decals on the bike while they are still attached to the backing to check for alignment. Even if riders have already done this as part of the process of checking their kits, it won’t hurt to do it again.
Step Three: Apply One Decal at a Time
People who don’t have experience with installing graphics kits should start with a large, easy-to-apply decal. When peeling off the backing sheet, start at the larger end of the sticker and use a light detergent mix in a mist sprayer to wet the adhesive if necessary. Slide the graphics into place carefully, checking for air bubbles.
If there are air bubbles in the graphic or it isn’t quite placed right, there is a short time frame for reapplying it. Lift it off and place it in the correct position quickly before working out any air bubbles that are left.
Step Four: Set the Adhesive
As soon as the decal is in the right position, apply heat using a hairdryer or a heat gun. This step in the process helps to set the adhesive and create a more robust seal. Bike owners should take their time while warming up graphics, especially if they are small or have complex shapes. These decals are more likely to curl than large, flat graphics.
Step Five: Repeat as Needed
Work on one graphic at a time, and make sure each of them looks perfect before heat-treating it and moving on to the next one. Patience is the key to getting this process right, so don’t rush it. Take the time to perform each step with diligence, then repeat as needed until all of the graphics are applied.
Tips for Removing Old Graphics
Applying a graphics kit to a brand-new bike with perfectly clean plastic is relatively easy. However, not all riders purchase their bikes brand-new, and those that do may eventually want to trade out the stickers. Removing the old graphics can take some work, so start prepping the bike a few days before the new ones arrive.
Be careful when removing graphics, especially when using adhesive removal products like paint thinners, acetone, isopropyl alcohol, and lighter fluid. All of these substances can help with adhesive removal but they can also damage the new stickers if they aren’t fully removed and can be dangerous to human health if applied incorrectly. Some experienced riders also use hair dryers to apply gentle heat before attempting to remove old decals.
If the plastic beneath the graphics has sustained damage, now is the time to replace it. The new stickers will need to be applied to a clean, flat, smooth surface that is free from plastic spikes, barbs, and cracks.
Take the First Step
The idea of modifying a brand-new dirt bike with a graphics kit can be intimidating to some riders. There’s no need to commit immediately. Start looking into graphics kits well in advance and choose one that will look great. Finding the perfect product will quickly turn anxiety about trying a new mod into excitement to get that perfect style.