DIY Floor Leveling: Tricks to Avoid Using Leveling Compound
When it comes to home renovation, achieving a perfectly level floor is often a crucial step. Traditionally, leveling compounds have been the go-to solution, but they can be expensive and sometimes overkill for minor imperfections. In this comprehensive guide, we’ll explore alternative tricks and techniques to help you achieve a beautifully level floor without relying on leveling compounds. Whether you’re a seasoned DIY enthusiast or a novice, this guide has something for everyone.
Assessing Your Floor

Before embarking on your floor-leveling journey, it’s essential to assess the current condition of your floor thoroughly. This step will help you understand the scope of the project and the specific challenges you’ll face. Common issues to look out for include low spots, high spots, and overall unevenness. By identifying these problems upfront, you can make informed decisions about the most appropriate leveling technique to achieve a smooth, level surface that meets your expectations.
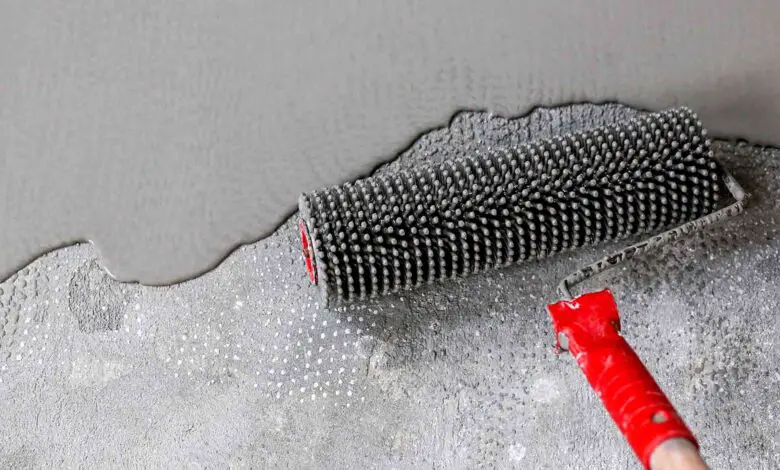
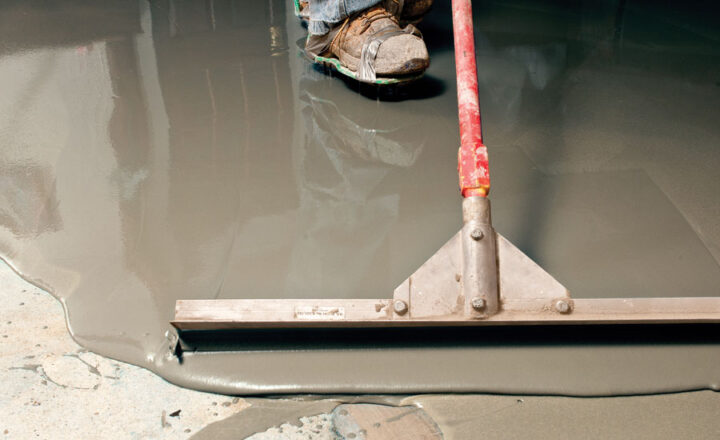
Use Self-Leveling Underlayment
Self-leveling underlayment is a versatile and cost-effective alternative to traditional leveling compounds. Its magic lies in its ability to flow and fill low spots seamlessly, creating a smooth, level surface effortlessly. The advantage of self-leveling underlayment is that it requires minimal effort on your part to achieve a perfectly level result. Simply pour it onto your floor, and it will self-distribute to create a uniform surface. This method is ideal for addressing minor to moderate leveling needs and is compatible with various floor types, including concrete and wood, making it a go-to choice for many DIY enthusiasts. This is the best route to take if you can’t afford professional gypcrete contractors.
Prioritize Floor Cleaning

Before attempting any leveling work, thorough floor cleaning is paramount. Dust, debris, and residue can compromise the bonding of leveling materials, leading to subpar results. Depending on your floor type, different cleaning methods may be necessary to ensure a pristine surface. For instance, hardwood floors may require a gentle sweep and mop to remove dust and dirt, while concrete surfaces may need more robust cleaning with a degreaser and a power washer to eliminate stubborn stains and grime. Taking the time to clean your floor properly sets the foundation for a successful leveling project.
Plywood Subfloor Adjustment
When dealing with wooden subfloors, adding plywood sheets is a tried-and-true method to level the surface effectively. Choosing the appropriate plywood thickness to match the depth of your low spots is crucial. The installation process involves securely fastening the plywood sheets to the existing subfloor, ensuring they sit flush with the surrounding area. This technique shines when addressing localized unevenness, providing a stable and level surface that can serve as a solid base for various types of flooring materials.
Sanding High Spots
High spots can be a common issue on hardwood or plywood subfloors, and identifying these protruding areas is the first step toward leveling the surface. To address them, you’ll need to undertake a sanding process that demands attention to detail and safety precautions. Equip yourself with a dust mask and safety goggles before wielding a belt sander or an orbital sander. Gradually and methodically remove the high spots until the entire floor is even, creating a foundation suitable for various floor coverings.
Grind Down High Spots
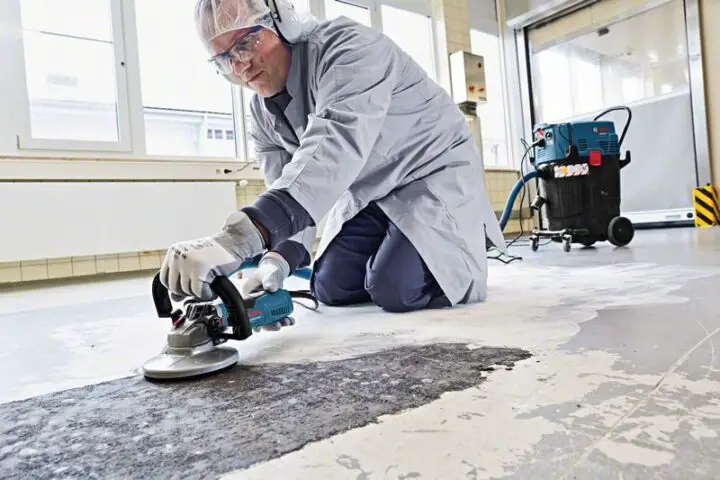
For concrete subfloors, particularly in cases of pronounced high spots, a concrete grinder becomes your best friend. These machines are readily available for rent at many home improvement stores, offering a cost-effective solution. However, operating a concrete grinder requires careful adherence to the manufacturer’s instructions and safety guidelines. Always wear protective gear, including earplugs and a dust mask, to safeguard your well-being while effectively grinding down the high areas until they seamlessly align with the rest of the floor.
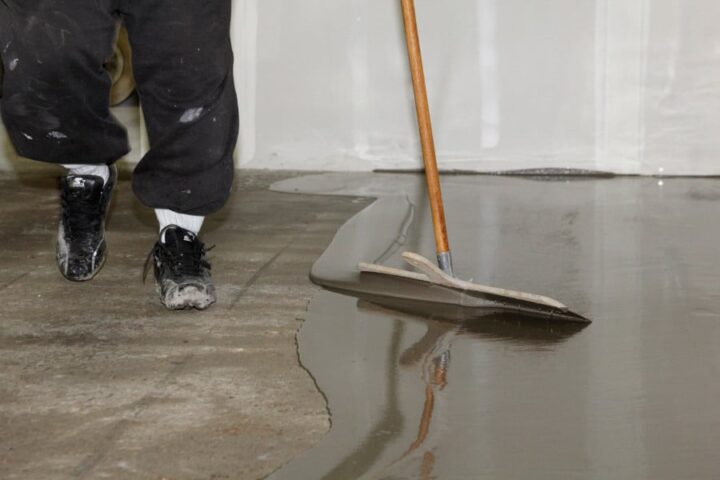
Feather Edging Technique
The feather edging technique is a masterful method to blend low spots with the surrounding floor, achieving a visually and structurally seamless transition. It involves applying a thin layer of a leveling material, such as a floor patching compound, to create a gradual slope between the low spot and the adjacent floor area. Executing this technique successfully requires precision and patience, as you meticulously feather the edges to ensure a flawless integration. When done correctly, it yields excellent results, making imperfections virtually disappear and leaving you with a leveled canvas for your flooring installation.
Leveraging Floor Leveling Techniques
To achieve a truly level floor without relying on leveling compounds, you may find it beneficial to combine various techniques strategically. For example, while self-leveling underlayment can handle most of the floor, employing the feather edging technique for specific problem areas can be a game-changer. This flexibility allows you to adapt your approach to the unique challenges presented by your floor, ensuring a comprehensive leveling solution that aligns with your project goals.
Use Floor Patching Compounds Sparingly
In certain instances, floor patching compounds can prove invaluable for minor corrections and fine-tuning. However, it’s crucial to exercise restraint and apply them sparingly, reserving their use for addressing small cracks, divots, or imperfections. When used judiciously and applied correctly, floor patching compounds can save you time and effort compared to other leveling methods, making them a valuable addition to your arsenal of floor leveling techniques.
DIY Tools and Equipment
To embark on your DIY floor leveling journey with confidence, you’ll need a well-curated set of essential tools and equipment. These include a level, tape measure, trowel, buckets for mixing materials, and safety gear such as gloves, goggles, and a dust mask. Depending on the techniques you choose, you may also require specialized tools like sanders, grinders, and saws, which should be rented or purchased based on the specific demands of your project. Always prioritize safety when working with power tools, ensuring a secure and hazard-free environment for your floor leveling endeavors.
Conclusion
Achieving a level floor doesn’t have to break the bank or be a daunting task. By assessing your floor, choosing the right techniques, and using the tricks outlined in this guide, you can achieve a beautifully leveled surface without the need for expensive leveling compounds. So, roll up your sleeves, gather your tools, and get ready to transform your space one level step at a time. Happy DIY leveling!