Important DIY Tasks You Should Consider While Furloughed

The global pandemic has left a large percentage of the population stuck in doors. This has caused two things; our homes are subject to more wear and tear. And those stuck inside have more free time to address that wear and tear.
So why not make the most of your time off by catching up with all those essential DIY tasks around your house and garden?
Unblocking sinks
According to the drainage experts at Aspect.co.uk, one of the most common issues affecting homes around the UK during lockdown has been blocked drains. Aspect’s drainage engineers put this down to people spending more time at home, cooking more and simply putting their drainage systems under more stress.
So perhaps this is one of the more pressing issues to address before lockdown ends.
Prevention is better than cure here. Aspect’s experts recommend monitoring what goes down your drains, especially in the kitchen. Scrape plates into the bin before rinsing to stop food debris getting into the drain and avoid disposing of grease or fat down the drain, as these are two of the most common causes of blocked drains.
If you can’t avoid disposing of small amounts of fat or grease down the sink, follow it up with a long blast of cold water. This causes fat and grease to solidify slightly, which may sound like a bad outcome. But it actually prevents the waste from clinging to the drainage pipes and causing a blockage.
If you’re dealing with a blocked drain, here’s how to address it
- Detection; if you’ve got water backing up from your sink, the sink isn’t draining fully or takes longer than it should, or you get a nasty smell any time you empty your sink, it’s probably a blockage.
- Try boiling water first (carefully). Boiling water can cause certain soft blockages to disintegrate. If boiling water doesn’t do the trick, try adding some salt to the water.
- If it’s a stubborn blockage, try pouring a small amount of bleach into the plug hole to see if it helps the blockage. If that fails, try baking soda and water.
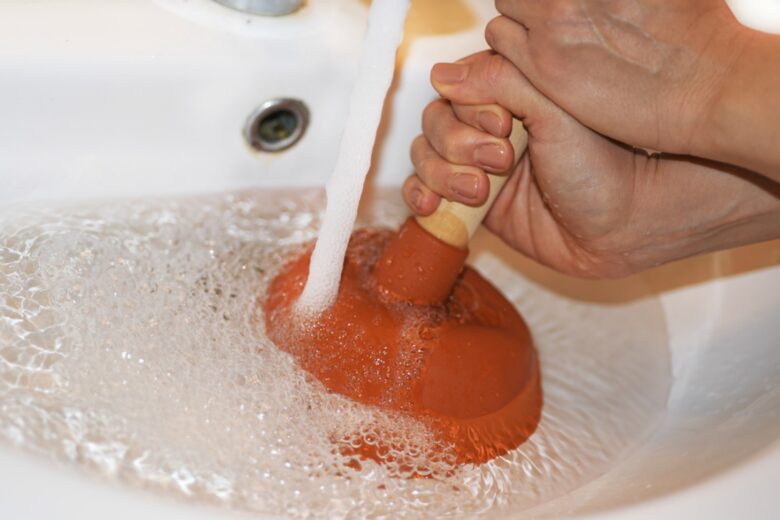
- If you’re still dealing with a blockage after these steps, try using a plunger. Plungers work by applying pressure and force, via water, to the blockage. If you have a double sink, block one of the plug holes.
- Put the plunger over the plug hole and fill the sink with water until the bell of the plunger is covered completely.
- Gently push the handle of the plunger up and down. This allows a small amount of water to pass through the seal and the combination of suction and pressure moves the water around in the drain. This movement can cause friction and should dislodge the blockages.
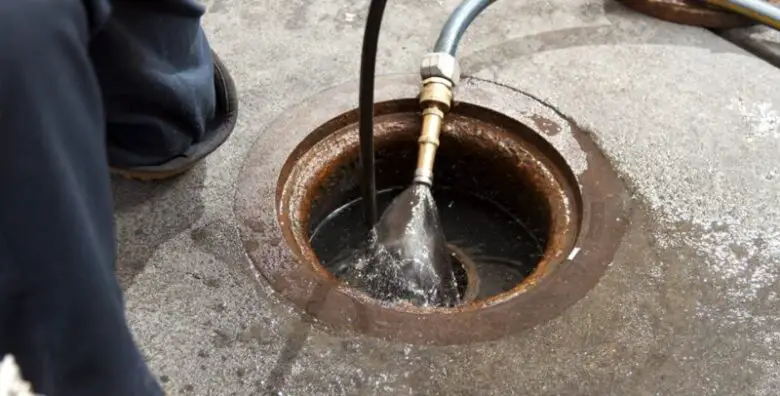
- If using a plunger doesn’t work, it may be necessary to mechanically dislodge the blockage. In this instance it’s better to call in a professional as it’s possible to cause more damage by using tools such as a plumber’s snake and you may also invalidate any home insurance policies by making the attempt.
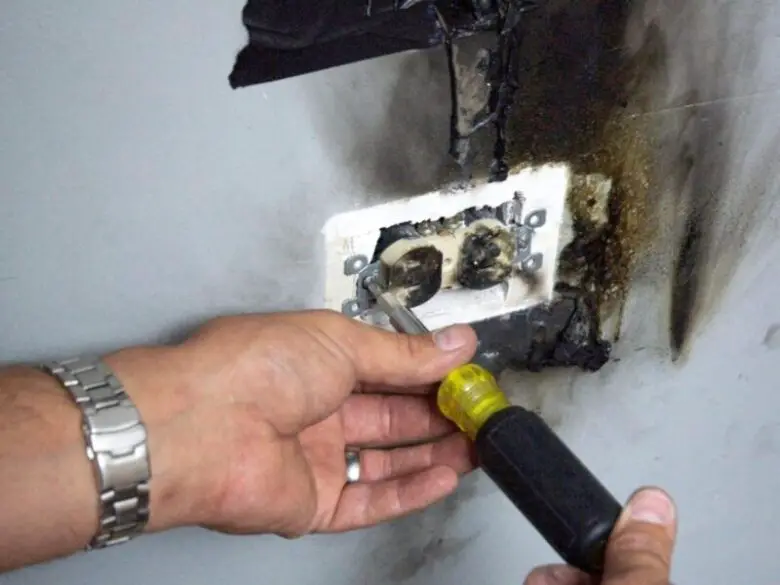
Replacing a Damaged Socket
Scorched sockets indicate overloading or loose plug connections. You’ll need to fix these before moving on to replacing the actual faceplate. When you’re ready, these are the steps you’ll need to follow.
- Isolate the circuit, double-checking it doesn’t work by using a socket tester. Loosen the faceplate and pull away from the wall, keeping the screws.
- Strip ends of the wire and replace sleeving if it’s been heat damaged. Also, make sure metal back boxes are earthed by linking them to the faceplate with a short length of cable.
- Connect all the terminals back up, tightening the screws as you go. Then re-attach the faceplate to the wall. If the new screws don’t fit, use the existing ones. Test the socket using a socket tester to ensure it’s been wired correctly.
Treating Outdoor Decking
Summer is the ideal time to get in your garden and give your decking some much-needed TLC. Untreated decking is particularly prone to the elements and if left untreated, can rot. Use these steps to make sure this never happens.
- Before picking up the paintbrush, ensure your decking is thoroughly clean and dry. Stir the paint or stain well.
- Using a paintbrush, start in the furthest corner away, working your way back, and along the lengths of wood. Applying the coating generously, paint 3-4 boards at once, from one end of the deck board to the other. Doing this avoids overlap while maintaining a ‘wet edge’.
- Leave the first coat to dry, applying more layers if needed. Once finished, rinse the brushes thoroughly in water, then soak them in a paint brush cleaner.
Replacing Guttering
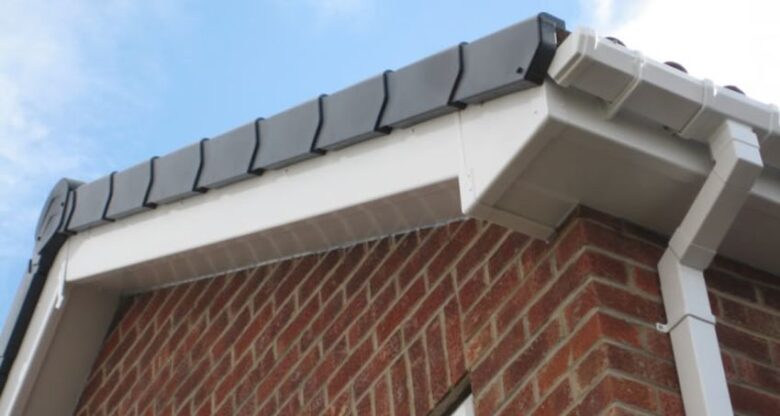
When replacing guttering, it’s best to start at the section containing the ‘outlet,’ i.e. the section which links to the downpipe. Also, remember that plastic guttering expands and contracts. So, make sure sections are correctly aligned. Never rest your ladder on guttering. Instead, use a metal standoff which props it against the wall.
- Starting at one end of the gutter, install a bracket at the top of the fascia board, tying some string or builders line at its base.
- Hold your plumbline over the drain and against the fascia to determine the right position for the outlet. Then mark this with a pencil. It should be positioned within 50mm of the roof tiles above.
- Stretch the line from the bracket, across the fascia board, then tie to the outlet. Using a spirit level, ensure there’s a gradual slope so the water will drain properly. 10mm for every 6 meters is sufficient.
- Install the other brackets at intervals of 800mm at the most. For steeper roofs, they should be fitted every 150mm. If the outlet falls in the middle of the gutter, ensure both runs slope towards it.
- On the first length of gutter, fit a stop end, then clip the gutter onto the brackets. Repeat the process. Once you’re at the final piece, trim the gutter using a hacksaw and fit, making sure it lines up correctly.