Color Grading Your Beauty Videos with Wondershare Filmora

Editing and developing quality videos for a variety of uses is how most modern content creators satisfy their fans and become successful. Whether it is big-name studios or independent creators, the need for all the different ways in which a video can be made better is huge in the 21st century. Most forms of media nowadays heavily rely on good visuals, from simple guide videos to bigger projects like movies, TV shows, or even video games. No longer do we have to ask ourselves what the crucial thing of entertainment is, because everyone knows the answer has to deal with what we can see and how good it looks.
In such a climate, there is also a need for top-of-the-line video editing software and tools that can allow you to change, create, and improve what you have captured on camera. Without such programs and services, the creators and artists you like and support would hardly be able to release so much content, and so frequently. The difficult part of it all is the learning curve and the high amount of skills you need for even the simplest of edits and corrections. Among the things you need for virtually any video is color grading, the act of changing the color scheme and pattern of the separate parts of your video or the entire video.
If this is something you have the need of during your average day of video editing, you know how difficult it may get if you lack the proper tools. In order to help you with this, we devoted this article to the color grading aspect of editing your videos. More precisely, we will talk about Wondershare Filmora, one of the most popular solutions for any form of color grading and giving more beauty to your video content. Keep on reading to learn how to do it, and make sure to check out Wondershare Filmora.
What is Color Grading?
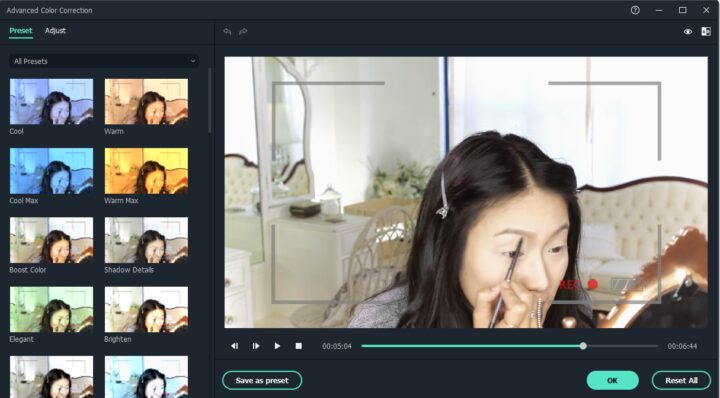
You may already have some idea what color grading is as the name is somewhat self-explanatory. However, you have to know a lot more about it before you can become good at it. Color grading is a process which enhances and changes the colors of the images you want to edit. Every aspect of the colors can be changed vastly, including the contrast, black and white levels, actual colors and shades, saturation, and a lot more. The whole process comes following color corrections, if they were previously needed in the first place.
What it Does
While it may seem unnecessary for certain types of videos, especially if you want to keep the originality and naturalness of what you have captured, the grading does not have to change the video dramatically. Since it enhances the color scheme, it can still keep exactly what you want but bring everything forward and make it more impactful. The process does some truly amazing things which we will now examine.
First off, you can complement the input or the output and better figure out the whole timeline of the video. You can also brush away distractions and isolated spots, or isolate spots you want more attention on. By doing this, it is possible to both match things together and separate them so that they are easier to spot and focus on.
Then there is the handling of spectator’s view where the editor uses the shape masks or attracting eyes to the points of interest in the image/video. Finally, it is easy to manage the results as the whole process of color grading is made to be done both as a whole and as separate, smaller areas.
Steps to Take
Now that you are more familiar with Filmora and its color grading features, it is time to talk about the step by step approach to actually doing it. First off, you will need to adjust the YUV color correction. This is a rather easy step as you only need to open the controls and then pick effects. A drop down window will appear after which you choose YUV color correction. Now you can finely tune and improvise the color of the image in question. You may also want to try the highlighter slider and the shadow slider for more options and solutions and an additional touch of editing.
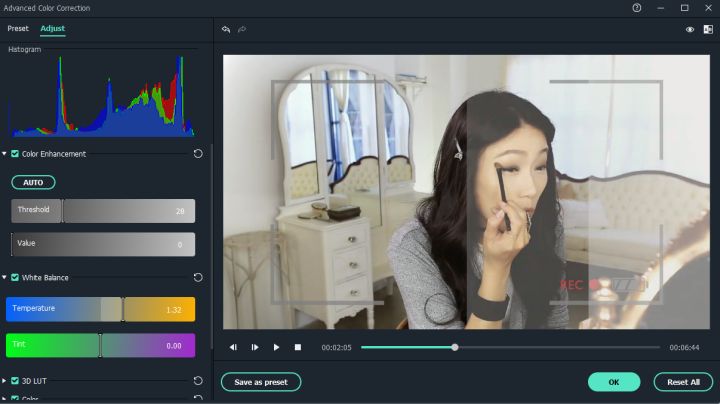
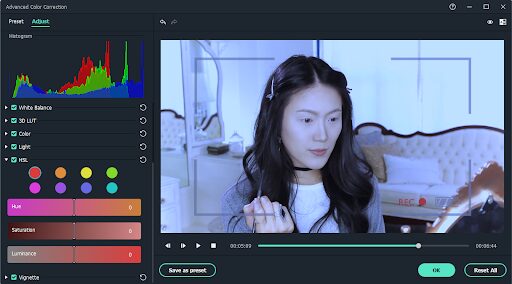
The second step is to change the hue, the saturation, and the lightness of your images. Filmora Pro is the best when it comes to this. Again, it is an easy process. From the effects menu, choose color correction and then pick one of the three, hue shift, saturation, or lightness. They each have their own sliders and parameters for all the different colors, so it is easy to balance it out exactly how you want it or need it to be.
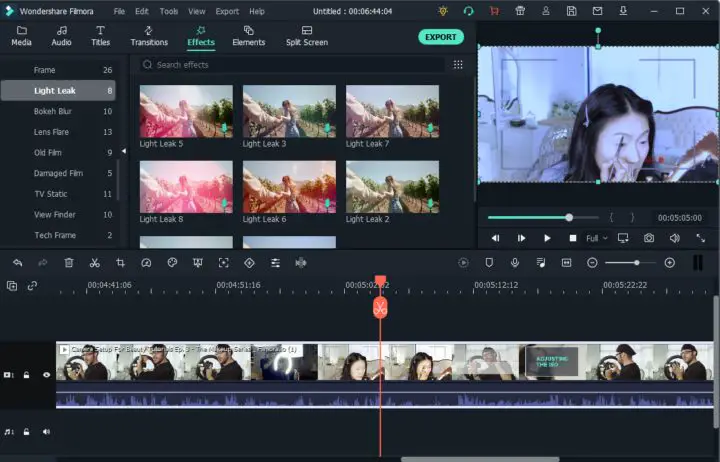
The third thing to do is to use lights and flares, again from the effects section of the software. After this, navigate to the anamorphic lens flare which will give you additional options like alignment changes, vertical points, and tracks. It pays to play around with all of these setting to try them out at first and learn exactly how they will change your video and whether it is something you need. You can always reverse it if you do not like it.
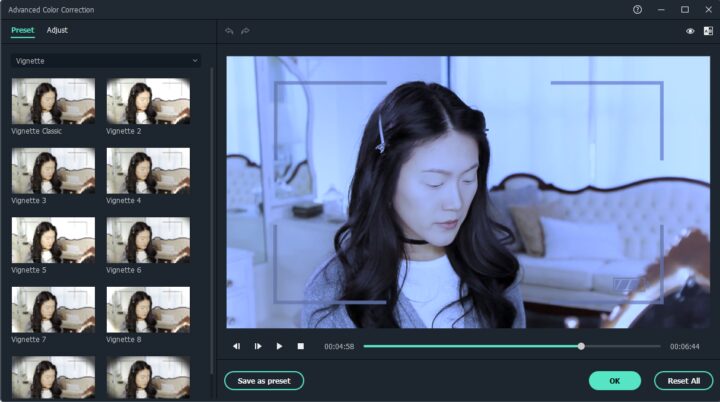
The fourth and final step in terms of changing the colors is to use a vignette. This will customize the portrayal of your video and it is straightforward and simple to use. There are, again, different sliders to pick and choose depending on what you need. Vignettes are yet another option present on the effects menu.
Saving the Preset
After you have finished your color grading process, you should save the combination you did as a preset especially if you suspect that you will use it again. Then when you upload a new project, you can choose the preset and not have to go through all the separate steps again. Go to effects, then right-click and pick the option to create a preset. Save it, and remember to use it when another similar project comes around!